I've Moved!

Saturday, February 26, 2011

peanut butter banana cream pie.


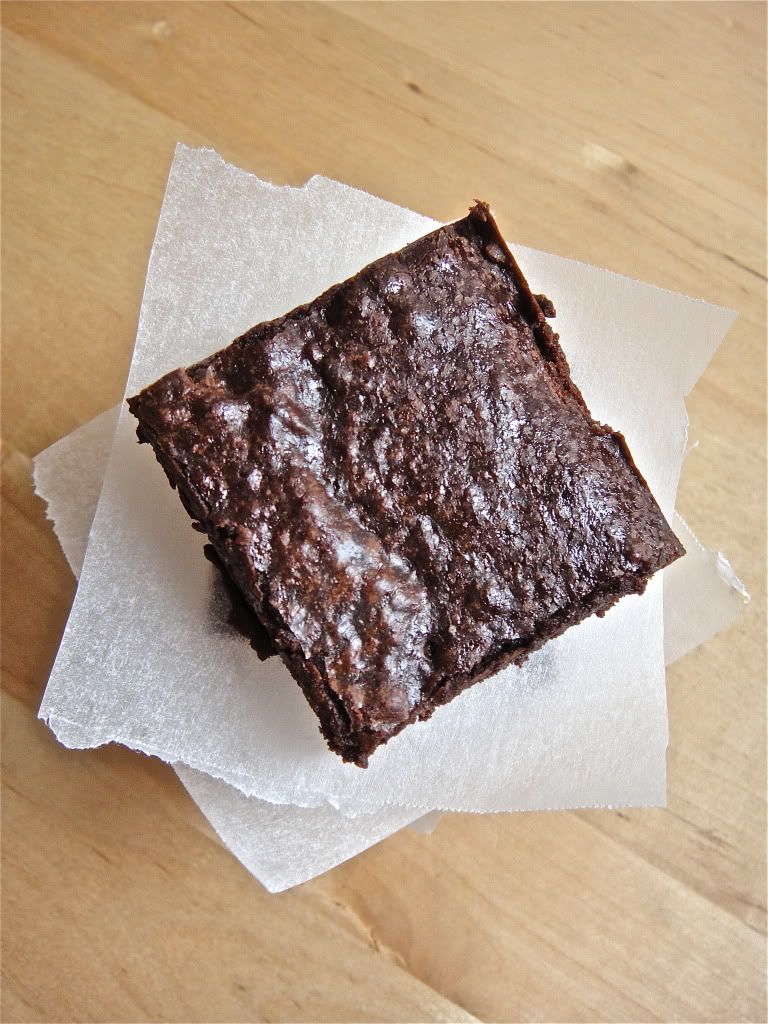
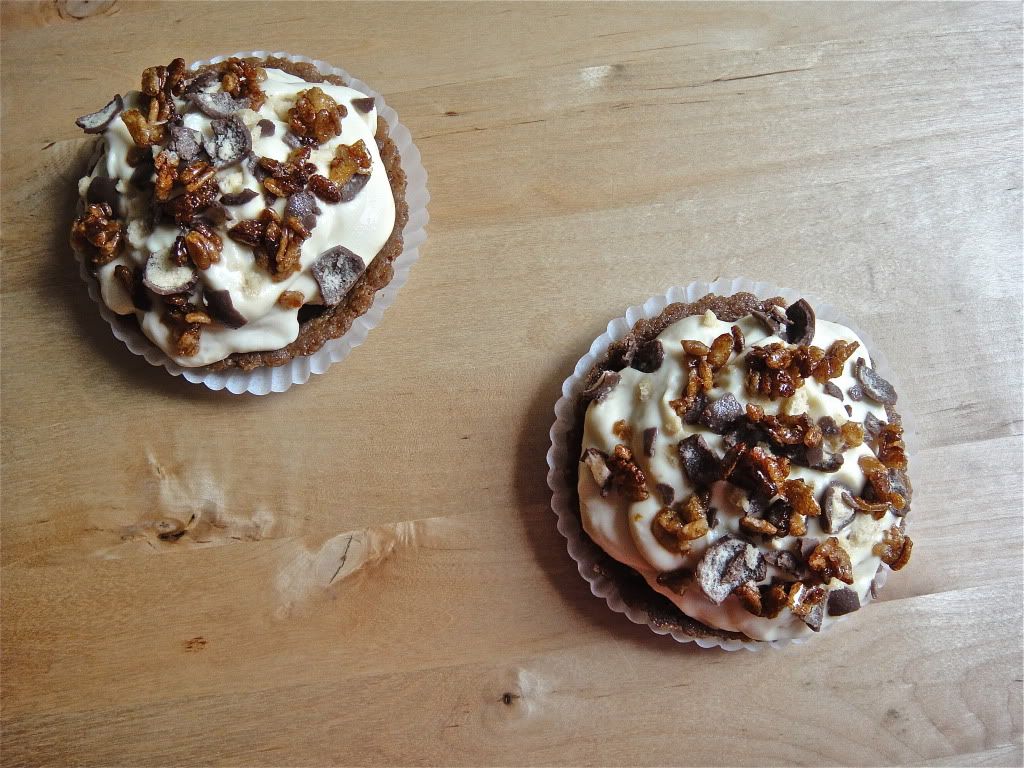
First of all, please excuse the boring shots. There are only so many angles you can take a peanut butter banana cream pie from when it's unmoldable(!) 


You see, I scaled down the recipe and baked it in mini pie pans, without considering how in the world is the graham crust going to taken out of the pan without crumbling into a million bits. So that's why its still in the pan. Funny thing is, when I was halfway devouring through a mini pie all by myself (can you see why I love miniatures?) I realized that the crust at the bottom was packed tightly enough to be able to be released. So I did, and then I had this.

No matter, it was still delicious anyway. I loved how vanilla-y that pudding was. There was a half teaspoon  in every portion of pudding. Awesome. And that peanut butter cream cheese topping? The peanut butter wasn't shy, if you know what I mean. Excellent for people like myself who eat that thing straight from the jar.

If you're wondering, those colourful buttons on the top are Reese's peanut butter pieces. A note of caution: the colours run! After coming into contact with the moisture from the peanut butter topping, the shells started to lose their colours which will in turn spread on the topping. Not a pretty sight. So if you do decide to top your pie with them, do it a la minute. Otherwise, use salted peanuts. Yum!

You know how bananas will turn black after slicing? I found a solution for that without the use of lemon or orange juice. Fill the crust with half your pudding, arrange the sliced bananas on top, then pour on the remaining half. I got this tip from America's Test Kitchen and it totally works!

Peanut Butter Banana Cream Pie
adapted from Baked Explorations


For the crust:
6 ounces vanilla wafer cookies *I used digestives
•6 tablespoons (3/4 stick) chilled unsalted butter, cut into 1/2-inch cubes
•2 tablespoons sugar
For the vanilla pudding filling:
•1/3 cup sugar
•1 1/2 tablespoons cornstarch
•1/8 teaspoon salt
•1 cup heavy whipping cream
•1/2 cup whole milk
•2 large egg yolks
•1 vanilla bean, split lengthwise
•1 tablespoon unsalted butter
•4 firm but ripe bananas, peeled, divided
•3 tablespoons orange juice, divided *Refer to my tip!

For the peanut butter layer:
•3 ounces cream cheese, room temperature
•1/2 cup powdered sugar
•1 teaspoon vanilla extract
•1/3 cup creamy peanut butter 
•2/3 cup chilled heavy whipping cream

Preparation

•Preheat oven to 350°F. Combine all ingredients in processor; blend until mixture resembles moist crumbs, about 1 minute. Transfer to 9-inch-diameter glass pie dish and press mixture onto bottom and up sides (not rim) of dish. Bake crust until golden brown, about 12 minutes. Remove from oven; press crust with back of spoon if puffed. Cool crust completely.
•Whisk sugar, cornstarch, and salt in heavy medium saucepan until no lumps remain. Gradually whisk in cream, then milk. Add yolks and scrape in seeds from vanilla bean; whisk to blend. Cook over medium heat, whisking constantly, until pudding thickens and boils, about 5 minutes. Add butter and stir until melted. Spread warm pudding in cooled crust. Chill until filling is cool, about 1 hour.

•Thinly slice 3 bananas on diagonal. Combine banana slices and 2 tablespoons orange juice in medium bowl; toss to coat. Transfer banana slices to paper towels and pat dry. Arrange enough banana slices in single layer over vanilla custard filling to cover completely.
peanut butter layer.

•Using electric mixer, beat cream cheese and powdered sugar in medium bowl until smooth. Beat in vanilla, then peanut butter. Beat cream in another medium bowl until firm peaks form. Fold large spoonful of whipped cream into peanut mixture to loosen, then fold in remaining cream in 2 additions. Spread peanut butter layer evenly over bananas. Chill at least 3 hours. Can be made 8 hours ahead. Keep chilled.

•Thinly slice remaining banana on diagonal. Toss with remaining 1 tablespoon orange juice (to prevent fruit from browning), then pat dry with paper towels. Arrange banana slices around top edge of pie.


Sunday, February 20, 2011

best cocoa brownies.

There are too many recipes I want to try, so I hardly have any repeats.

This is the second time I'm making this brownie. So you know it's gotta be good.

Check out Alice Medrich's Best Cocoa Brownies here!

Saturday, February 19, 2011

malted milk ball cake.


Hello. My name is Malted Milk Ball Cake. I was born in Baked and... I'm here to bust your diet.


Believe me, I have never made a chocolate cake (complete with frosting and all) in my life. I have never ever made a triple layer chocolate cake with tons of frosting in my life.

And now I have.

My wallet and I are still in shock over the amount of chocolate that went into the frosting (because I didn't use the one in the recipe) even after I managed to find a truly commendable one that used cocoa instead of chocolate. Confused? Okay, let's start from the bottom.


Malted cake layer. Cocoa frosting. Malted Cake layer. Cocoa frosting. Malted Cake layer. Milk chocolate ganache. Maltesers.

I didn't make the a 8 inch 3 layer cake like the recipe intended. I made 2/3 of it, baking the batter in 3 7 inch layer cake pans instead.

Because I wanted to make a triple layer cake. 

Back to the frosting issues. If I had made the milk chocolate buttercream frosting, it would require 4 sticks of butter. That's 2 cups people. 2 cups! And that's not counting the amount that already went into the cake. Horror movie. Even if I halved the recipe I would still be in cholesterol shock. Wait, that's not my problem yet... My parents would get cholesterol shock. And wallet shock. So I turned to the ever reliable The Cake Bible by Rose and bingo! Milk chocolate ganache! Sure, it contains copious amounts of chocolate and cream but that's not as bad as mini mountain of butter. To me, that is.

The problem is, I didn't have enough chocolate to make enough frosting to fill and frost the whole cake. Thank goodness for the cocoa frosting! It makes a ton, so I scaled down the recipe to 1/4 of the original to fill the layers. I still have frosting leftover. Can you imagine? It totally blew my mind. I never knew chocolate frosting without chocolate could be so good! My only gripe is that the frosting was a little grainy. Incredibly cocoa-y and probably even lower in fat! But what does that matter when I've already consumed a day's fat intake in one sitting? It's sweet but not too sweet. What's frosting without sweetness anyway?

The milk chocolate ganache was faultless. Although, I should have used it to fill instead of frost. It's density toppled my slice of cake when I was plowing halfway through. I think I prefer creamy frostings. The density was a nice contrast, but...

Now let's talk cake. Cake cake. The malted cake had just egg whites, which made it so so soft right out of the oven. I just had to flip it over while it was still warm and big surprise, it cracked. Not all the way though but sort of halfway. Good going, Amanda. Luckily it was still save-able. I wrapped the cooled layers in cling wrap and tossed them in the freezer for easier frosting the next day.


There's an advantage to an all egg-white cake. The crumb just melts in your mouth. I still dream about it. But I didn't fold in the egg whites thoroughly so the cake was denser at the bottom. Unfortunately, that's where all the flavours went too. You see the difference in colours in the layers? Yup, the darker ones are the more flavorful ones. They had a nice malted flavour (duh) that wasn't too overpowering and the use of nutmeg totally works! Dig it. The lighter cake layers suffered from a lack of malty-nutmeg oomph but the frostings save the day!


I think making layer cakes are addictive. I feel like making another one next week! What are your favourite layer cake recipes? Do share!

Tuesday, February 15, 2011

flour bakery's granola bars.


Sounds healthy? But we all know, deep deep down, that this granola bar is nothing but another sinful crumb bar in disguise.

I like that this recipe isn't shy with the crust. Seriously, if you're going to make something with streusel or the like, you may as well go all out. The diet is halfway down the drain already anyway. I can't say no to anything crusty. You name it, I love it. Pie crust, shortcrust pastry sweet and savoury, oreo cookie crust, graham cracker crust... We know cookie monster, and now we have crusty monster. Oops, I digressed. What I need to point out to all cinnamon lovers out there is that there is a serious shortage of cinnamon in here! I quadrupled, yes quadrupled, the amount of cinnamon and that still wasn't enough.

I like my cinnamon so I would advise you to go with as much as you like instead of sticking with the measly amount the recipe calls for. Too much cinnamon never hurts. Never.

No recipe posted today because... I'm lazy. Sorry!

Saturday, February 12, 2011

malted crisp tart.

Baked should have a book completely dedicated to malted recipes. I'm serious. Because this malted diplomat cream is that good.
P.S the malt pastry cream tastes like ice cream.
And so is the caramelized rice krispies and the brown sugar tart crust. And then they added chocolate ganache and maltesers. Are they out to make me faint from delight?

If you ever decide to bake the recipe as individual tarts like me instead, you may want to reduce the amount of tart dough. I quartered it to make two individual tarts, but the crust is a tad thick. Not that I'm complaining though. And go easy on the rice krispies too. I had way too much leftovers that disappeared way too fast.

It's one of those rare fancy schmancy recipes but it's definitely worth the effort.

Baked has totally redeemed itself with this recipe.


Malted Crisp Tart
from Baked Explorations

For the brown sugar crust
  • 1 1/2 cups all-purpose flour
  • 1/4 teaspoon salt
  • 1 tablespoon malted milk powder
  • 10 tablespoons unsalted butter, cold, cut into half-inch pieces
  • 1/2 cup firmly packed light brown sugar
  • 1/2 teaspoon vanilla extract
For the caramelized crispies
  • 1/3 cup sugar
  • 2 cups crisp rice cereal
For the milk chocolate ganache
  • 8 ounces good-quality milk chocolate, coarsely chopped, (We used Scharffen Berger)
  • 2/3 cup heavy cream
  • 2 teaspoons malted milk powder
For the malted pastry cream
  • 1 1/4 c whole milk
  • 1/3 cup sugar
  • one large egg yolk
  • One large egg
  • 1 tablespoon plus 1 1/2 teaspoons cornstarch
  • 2 tablespoons malted milk powder
  • 2 tablespoons unsalted butter
  • 2 teaspoons vanilla extract
  • 5 ounces heavy cream
Additional items needed
  • One cup crushed malted milk balls
  • More malted milk balls to make it look pretty on top

To make the crust
Spray or butter the tart pan.  Pull out your food processor. Add all the ingredients for the crust in and pulse until you get crumbs.

Dump the mixture from the food processor into the tart pan. Press the crust into place.

Put the tart crust into the freezer for about 20 min.

Meanwhile turn on your oven to 350° Fahrenheit. Take the tart pan out of the freezer, put it on a baking sheet, and throw it  in the oven until golden brown between 20 and 30 min. Ours took 23 minutes. Pull it out of the oven and place on a wire rack to cool.

For the caramelized crisp rice
Note - If you have a Silpat or similar type of baking pad, you'll want to use it here. If you don't, the Baked guys recommend taking aluminum foil and spraying it  with vegetable oil.

Add 2 tablespoons of water and the sugar into a small saucepan. Place over low heat and get it boiling for 1 minute.

Add in the rice cereal and stir. Keep stirring until you start to see wisps of smoke rising up. Stir just a little bit more to make sure the caramelized sugar is all over the crispies and then pour them out onto the Silpat  or aluminum foil. Once cooled, break them into pieces if needed.

For the ganache
Chop up your milk chocolate and place in a medium-size bowl.

Whisk together the heavy cream and malt powder in a saucepan. Place it over low heat and bring to a simmer. Watch the cream carefully because it can boil in an instant and then it becomes terrible frothy mass. I speak from experience, having to start over. Pour it over the chocolate and let it sit for 2 minuntes. After the 2 minuntes. put your whisk in the middle of the mixture, turning around and around until you reach the edge of the bowl. It's a really beautiful process to watch the ganache come together.

To assemble the tart
Pour the ganache into the tart shell. Throw some crused malted milk balls on top along with one cup of the caramelized crisp rice. Slightly press milk balls and crispies into the ganache so that it all sticks together. Throw the tart in the refrigerator while you make the malted Diplomat Cream

Make the malted diplomat cream
Place a fine mesh sieve over a medium bowl.

In a medium-sized saucepan, bring the milk to a simmer and keep it warm.

In another medium bowl, whisk together the sugar, egg, egg yolk, cornstarch, and the malted milk powder until it becomes pale-ish yellow (about 1 minunte). Whisk in half of the warm milk into the egg mixture. Then pour the mixture back into the remaining milk in saucepan. Whisk the saucepan constantly until the whole thing thickens. Our mixture took about 8 minuntes. Yours may take less. Take it off the heat and throw in the butter and vanilla and whisk again until fully incorporated.

Then take the pastry cream and pour it into the sieve to remove any of the milk solids. Take a piece of plastic wrap and put it right on top of the pastry cream so you don't get any nasty thick skin on it. Put in the refrigerator for at least an hour until chilled.

Bring pastry cream after an hour out of the refrigerator and whisk it up until it looks like itself again.

In another bowl, whisk the heavy cream until you get soft peaks.Then fold it into the Diplomat Cream.

Take the tart out of the refrigerator and pour the Diplomat Cream on top of the milk chocolate. Garnish with some more malted milk balls if you have them and then the rest the caramelized crispies on top. It then needs to refrigerate for at least another 30 minutes.


 This tart is a proud participant of Sweets for a Saturday.

Friday, February 11, 2011

marble bundt cake.

I don't know... If I like this cake, that is. I just feel so betrayed by Baked. The cake was super moist from the addition of sour cream, but this was way too moist. It almost had a kueh-like texture. You know, spongy... moist... In fact, I even went to bake the slices for an extra 5 minutes to dry them out a little. And to get a nice crust. A nice crust never hurts.

The good thing about this recipe though, is that the chocolate bit of the marble isn't just cocoa-colored vanilla batter. It's Matts's and Renato's pet peeve too, so they made sure that the chocolate swirl has enough chocolate to be qualified as one. But to me, the killer application was the vanilla batter. What can I say? I love vanilla. 

Marble Bundt Cake
adapted from Baked: New Frontiers in Baking

For the chocolate swirl:
  • 6 oz. dark chocolate, chopped
  • 1 tsp. unsweetened cocoa powder
For the sour cream cake:
  • 3 ½ cups all purpose flour
  • 1 ½ tsp. baking powder
  • 1 ½ tsp. baking soda
  • ½ tsp. salt
  • 1 cup (2 sticks) unsalted butter, cut into 1-inch pieces and softened
  • 2 ¼ cups sugar
  • 4 large eggs
  • 16 oz sour cream
  • 1 ½ tsp. vanilla extract
  • Powdered sugar (if desired)

Make the chocolate swirl:
In a double boiler set over simmering water, melt the chocolate. When the chocolate is completely smooth, add the cocoa powder and whisk until thoroughly incorporated. Remove the bowl from the heat and set aside.

Preheat the oven to 350 degrees. Spray the inside of a 10” bundt pan with nonstick cooking spray.

Sift together the flour, baking powder, baking soda and salt into a medium bowl.


In the bowl of an electric mixer fitted with the paddle attachment, cream the butter until smooth and ribbon like. Scrape down the bowl and add the sugar. Beat until the mixture is smooth and fluffy. Add the eggs, one at a time, beating well after each addition. Scrape down the bowl and mix for 30 seconds. Add the sour cream and vanilla and beat just until incorporated. Add the dry ingredients in three additions, scraping down the bowl before each addition and beating only until each addition is just incorporated. Do not over mix.


Pour one third of the cake batter into the chocolate swirl mixture. Use a spatula to combine the chocolate mixture and cake batter to make a smooth chocolate batter.


Spread half of the remaining plain cake batter in the prepared pan. Use an ice cream scoop to dollop the chocolate cake batter directly on top of the plain cake batter. The dollops will touch and mostly cover the plain batter, but some plain batter will peek through. Pour the remaining plain batter over the chocolate batter, and use a butter knife to pull through the layers to create a swirl.


Bake in the center of the oven for about 1 hour, rotating the pan halfway through the baking time, or until a tester inserted in the center of the cake comes clean. Remove the cake from the oven and let cool on a wire rack for 30 minutes. Use a knife to loosen the edges of the cake and invert it onto the wire rack and let it cool. Sprinkle with powdered sugar if desired. Serve warm or at room temperature. The cake will keep for 3 days, tightly covered, at room temperature.

Sunday, February 6, 2011

homemade vanilla marshmallows.

I used to think Sure, I love to bake, but I'm never ever ever going to make candy. Candy including the usual suspects like caramel, fudge and marshmallows- anything that involves the use of a candy thermometer. I used to skip over any recipe that calls for caramel without a second thought, even though I knew I would be missing out on a triple layer chocolate caramel fudge cake for example. But look at me now! I've certainly made my fair share of salted caramel sauces, and now I'm venturing into the fluffy world of marshmallows.


There are mainly two kinds of marshmallows- one with egg whites and one without. I did my research and marshmallows with egg whites are supposed to be more melt-in-your-mouth, which is good for eating out of hand, but a bit of a pain when you want to top off your hot chocolate with it because it will melt away too quickly. So, I tried a recipe from Baked, which has no egg whites.

This isn't my first try actually. The first time I tried to make marshmallows, there was egg whites involved. The recipe must need some tweaking because I ended up with a meringue-like mixture that couldn't set no matter what I did. In the end, it ended up in the bottom of the trash bin. Not good.


Thank goodness the recipe worked this time. I do not understand how someone can be so relieved to see a bowl of white gunk but I was! Believe or not, I've never even seen marshmallow fluff, and when the recipe indicated to stop at that stage, I was so worried I would under beat it I kept going for more than the suggested 5 minutes. No harm done, rest assured. But I'm not sure if I ever want to see marshmallow fluff...

I heard that refrigerating to set the marshmallows was unnecessary but I had no choice because I was afraid the ants might attack. I took it out of the fridge after a night's rest and when it came back to room temperature, it was still pillowy-soft. Cold straight out of the fridge, however, they became denser and chewier. And is it just me, or do your marshmallows absorb all that icing sugar-cornstarch coating a few hours after?

I advise you to keep your fingers to yourselves because it's going to get sticky.


Vanilla Marshmallows
adapted from Baked: New Frontiers in Baking by Matt Lewis and Renato Poliafito
makes 48 large marshmallows

vegetable shortening
12 sheets gelatin
2 cups sugar
1 cup light corn syrup, divided
2 teaspoons pure vanilla extract
1/8 teaspoon salt
1/2 cup sifted confectioners’ sugar, plus more for dusting *I used a 50-50 mix of icing sugar and cornstarch instead

Grease a 9x13x2 inch pan with vegetable shortening. Set aside.
Fill a medium size heatproof bowl with very cold water and ice cubes. Place the gelatin sheets in the water and set aside.
Fill a medium saucepan halfway with water and place on the stove over medium-low heat.
In another medium saucepan, add the sugar, 1/2 cup corn syrup, and 1/2 cup of water and stir gently, making sure not to splash the ingredients onto the sides of the pan.  Put the saucepan over medium-high heat.
Put the remaining 1/2 cup corn syrup in the bowl of an electric mixer fitted with the whisk attachment. Set aside.
Check the temperature of the saucepan of water.  When the temperature reaches 220°F, drain the water from the gelatin and gently wring any excess water from the gelatin sheets. Place the bowl of gelatin over the saucepan of simmering water and stir until the gelatin is completely melted.  Remove the bowl from the pan.
Turn the mixer on low speed and slowly pour the melted gelatin into the corn syrup. Keep the mixer on low.
Place the candy thermometer in the saucepan with the sugar mixture. Bring the sugar mixture to the softball stage on the candy thermometer, 235-240°F. Remove the candy thermometer from the mixture and remove from the heat.  Turn the mixer to medium speed for 1 minute, then slowly pour the sugar mixture into the gelatin mixture. When all of the sugar mixture has been added, turn the mixer to medium-high and beat for about 5 minutes. The marshmallow mixture will begin to turn white and fluffy. Add the vanilla and salt and turn the mixer up to its highest setting for another minute.
Working very quickly, pour the marshmallow into the prepared pan. Use an offset spatula to spread the mixture evenly. Sprinkle with a bit of sifted confectioners sugar and let sit for at least 6 hours.
Run a knife around the edge of the pan to loosen the marshmallow and gently pull with your hands to remove. The marshmallow will come out in one large piece. Lay on a flat surface dusted with confectioners’ sugar.
Place 1/2 cup confectioners’ sugar in a small bowl.
Using a chef’s knife, cut the marshmallows into a 6×8 grid. Roll each marshmallow in confectioners’ sugar. Keep in an airtight container for up to 1 week.

Saturday, February 5, 2011

matcha latte.

Because I love matcha.


Matcha latte
serves 1

1 1/2 tsp matcha powder *Increase if you like yours bitter
4 tbsp boiling water
3/4 cup steamed milk
(optional: sweeteners such as sugar, honey, etc.)

Combine everything in the order given.

Enjoy!

Thursday, February 3, 2011

homemade granola.

Reason why you should make your own granola? You don't have to look at the price tag and wonder why this twisted food company charges so much for oats. You don't have to stand in front of 1000 different granolas debating between the almonds and vanilla one, the banana and pecan one, the walnut and raisin one... You don't have to open the box and exclaim, Why are there so little clusters?!
Basically, the best thing about homemade granola is that they are customizable. And my granola, using a recipe from Baked, contains pecans! and raisins. And tons of clusters, naturally. Now I have no reason to turn to store-bought granola.

Making granola is sticky sticky business, and I suggest you get out your protective gloves. But all will be well when the whole shebang gets onto the baking tray. Remember to line it!
I had the granola with a bowl of yogurt for breakfast. It was a touch salty so I would reduce the salt to maybe a 1/2 teaspoon. Even after finishing my breakfast, I still had to go back for more granola. Come on, this is more than enough proof to show how awesome is this!

Easy Homemade Granola
from "Baked: New Frontiers in Baking" by Matt Lewis and Renato Poliafito
makes 1 pound

Ingredients:
2 cups rolled oats
1 teaspoon cinnamon
1 teaspoon salt *I would reduce this to 1/2 teaspoon
3 tablespoons plus 1 teaspoon vegetable oil
1/4 cup honey
1/4 cup firmly packed light brown sugar
1 teaspoon pure vanilla extract
1/3 cup whole almonds *I just used 1/3 cup of pecans and 1/3 cup of raisins
1/3 cup whole hazelnuts
1/3 cup golden raisins
1/3 cup dried cherries

Preheat the oven to 325 degrees F. Line a baking sheet with parchment paper.
In a large bowl, toss the oats with the cinnamon and salt.
In a medium bowl, stir together the oil, honey, brown sugar, and vanilla. Whisk until completely combined.
Pour the honey mixture over the oats mixture and use your hands to combine them: Gather up some of the mixture in each hand and make a fist. Repeat until all of the oats are coated with the honey mixture.
Pour the mixture onto the prepared baking sheet. Spread it out evenly, but leave a few clumps here and there for texture. 
Bake for 10 minutes, then remove from the oven and use a metal spatula to lift and flip the granola. Sprinkle the almonds over the granola and return the baking sheet to the oven.

Bake for 5 minutes, then remove from the oven and use a metal spatula to lift and flip the granola. Sprinkle the hazelnuts over the granola and return the baking sheet to the oven.
Bake for 10 minutes, then remove from the oven. Let cool completely. Sprinkle the raisins and cherries over the granola and use your hands to transfer it to an airtight container.

The granola will keep for 1 week.

Tuesday, February 1, 2011

sweet and salty brownies.

These are the fudgiest brownies I have ever eaten. I swear.


And they're dense and chewy and just pure brownie nirvana. I had to have two- one straight out of the fridge and one at room temperature. I have to say I like my brownies cold and firm, somewhat like a chocolate bar, but only softer.

Chocolate and caramel may seem like a sugar bomb, but that's what you think. The caramel was cooked to a dark brown and lightly salted so what you have left is a sauce so darn good I ate it straight from the spoon. And doused my brownies with whatever remainder I had left.


Believe it or not, I didn't find it sweet enough for me. I actually found myself wondering if I should have added some white chocolate chips. Now that's an idea! Next time, I would just stop cooking the caramel when it's a light brown, so that it retains some of its sweetness.


But is it the best brownie? Nah, but it's close enough. My absolute-number-1-favourite-that-is-100%-to-die-for brownie recipe is Alice Medrich's Best Cocoa Brownies.

Sweet & Salty Brownie
from Baked Explorations: Classic American Desserts Reinvented

Caramel:
1 c. sugar
2 TBSP light corn syrup
1/2 c. heavy cream
1 tsp fleur de sel
1/4 c. sour cream

Brownie:
1 and 1/4 c. flour
1 tsp. salt
2 tbsp dark cocoa powder
11 oz. quality dark chocolate (60-72%), coarsely chopped
2 sticks unsalted butter, cut into 1-inch cubes
1 & 1/2 c. sugar
1/2 c. firmly packed light brown sugar
5 large eggs, room temperature
2 tsp vanilla

Topping:
some fleur de sel
some coarse sugar


Make the Caramel:
In a medium sauce pan, combine the sugar and corn syrup with 1/4 c. water, stirring together carefully so you don't splash the sides of the pan.  Cook over high heat, until a thermometer reads 350 degrees and is dark amber in color. 
Remove from the heat and slowly add the cream (it will bubble up).  Then add the fleur de sel.  Whisk in the sour cream.  Set aside to cool.


Make the Brownie:
Preheat oven to 350.  Butter the sides and bottom of a 9 x 13" pan.  Line the bottom with parchment paper.  Butter the parchment.

In a medium bowl, whisk the flour, salt and cocoa powder.

Place the chopped chocolate and butter in a bowl over simmering water
Stir occasionally until the chocolate and butter are completely melted and combined. Turn off the heat, but keep the bowl over the water.  Whisk in both sugars until completely combined.  Removed bowl from pan.

Add 3 eggs to the chocolate mixture and whisk until just combined.  Add the remaining eggs and whisk until just combined.  Add the vanilla and stir until incorporated.  Do not overbeat the batter at this stage or your brownies will be cakey.

Add the flour mixture.  Using a rubber spatula, fold in the dry ingredients until there is just a trace of the flour mixture remaining.

Assemble:
Pour half of the mixture into the prepared pan and smooth the top with an offset spatula.  Drizzle and 3/4 cup of the caramel sauce (not all of it) over the batter, trying to stay away from the edges. Gently spread the caramel sauce evenly.  In heaping spoonfuls, scoop the remaining batter over the caramel layer. Smooth the brownie batter gently over the caramel.

Bake the brownies for 30 minutes, rotating the pan halfway through.  Brownies are done when a toothpick inserted in the middle comes out with a few moist crumbs.

Remove the brownies from the oven and sprinkle with the fleur de sel and the coarse sugar. *I recommend them chilled!